Commonly known in pastry circles as "Millionaire's Shortbread," the salted caramel shortbread bar represents an elegant interplay of textures and temperatures. A master-class slice must showcase three distinct layers: a crisp, buttery, melt-in-the-mouth shortbread biscuit base, a rich, chewy, golden caramel core that holds its shape cleanly under a knife, and a snappy dark chocolate cap.
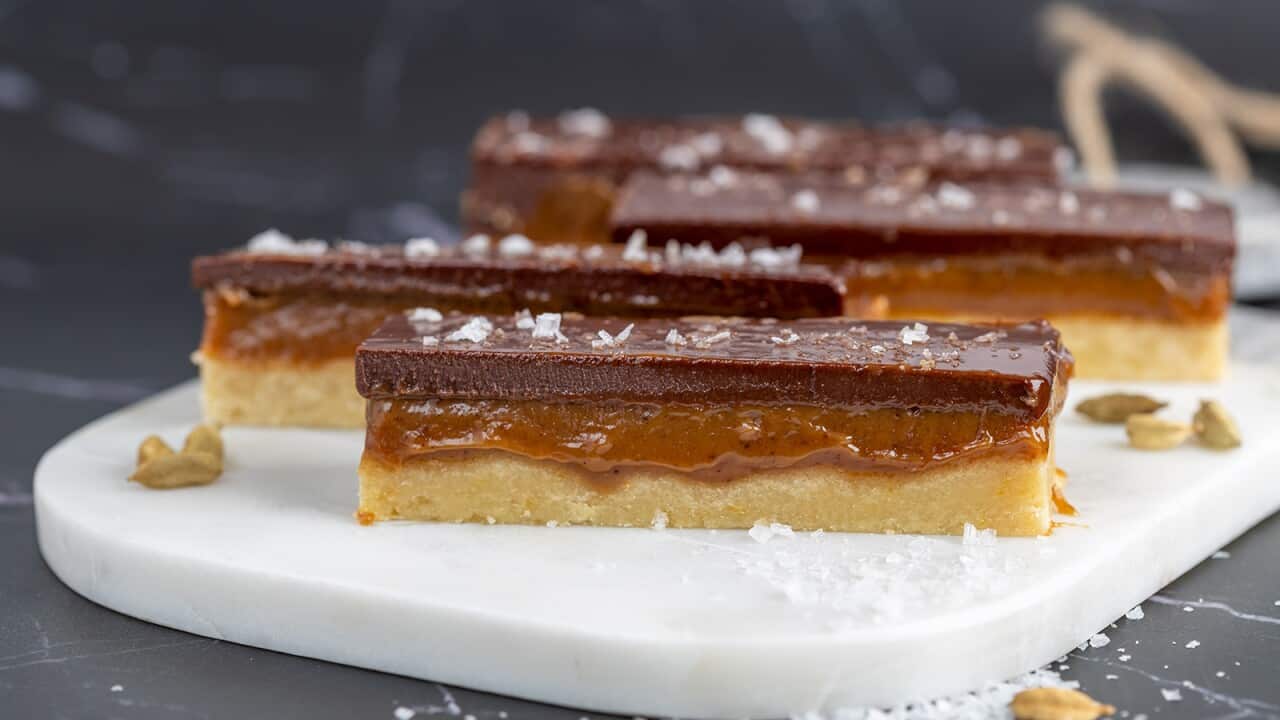
The primary technical failure with this bar is structural separation—where the chocolate slides off the caramel, or the caramel squeezes out of the sides when bitten. Preventing these issues requires precise control over sugar caramelization and dairy fats. This guide breaks down the structural design and chemical steps needed to build a pristine, bakery-grade Millionaire's Slice.
Part 1: The Three-Layer Assembly Schema
To create a bar that stays perfectly intact, each layer must be formulated with its neighboring material in mind:
- The Shortbread Base: Must be baked to a deep golden hue. A pale, under-baked shortbread will act like a sponge, absorbing water molecules from the hot caramel above it and turning soggy within 24 hours.
- The Caramel Core: True sugar-and-water caramel can become dangerously brittle if overcooked, or completely runny if underheated. By using sweetened condensed milk as a base, we introduce milk proteins (casein) and pre-dissolved sugars that create a soft, stable caramel matrix that remains chewy and holds its edge under a knife.
- The Chocolate Cap: Pure melted chocolate snaps cleanly when cold. However, if the top layer is too hard, pressing down with your teeth will squeeze the soft caramel out of the sides of the bar. Blending a small splash of neutral vegetable oil into the chocolate breaks up the rigid fat crystals, letting the blade glide through cleanly.
Part 2: Total Ingredient Formulation Matrix
For the Shortbread Base
- 180 grams All-Purpose Flour
- 125 grams Unsalted Butter (Must be ice-cold and cut into 1cm cubes)
- 50 grams Extra-Fine Caster Sugar
- 1/4 teaspoon Fine Salt
For the Stable Caramel Core
- 120 grams Unsalted Butter
- 100 grams Soft Light Brown Sugar
- 1 can (397 grams) Sweetened Condensed Milk
- 1/2 teaspoon Flaky Sea Salt (Fleur de sel)
For the Soft-Snap Chocolate Topping
- 200 grams High-Quality Halal Semi-Sweet Chocolate Chips (55% to 60% cocoa)
- 1 tablespoon Neutral Vegetable Oil (such as canola or sunflower oil)
Part 3: Step-by-Step Technical Execution
Step 1: Form and Bake the Shortbread Foundation
Preheat your oven to 180°C and line an 8x8-inch pan with parchment paper. In a large bowl, combine the 180g of flour, sugar, and salt. Add the cold cubed butter. Using your fingertips or a pastry blender, rub the butter into the flour until the mixture looks like fine breadcrumbs with no visible butter chunks. Press the mixture firmly into the bottom of the pan to form an even layer. Use a fork to prick holes across the surface to let steam escape. Bake for 15 to 18 minutes until it is uniformly golden brown. Let the base cool completely inside the pan.
Step 2: The Caramel Crystallization Cycle
In a heavy-bottomed stainless steel saucepan, combine the 120g of butter, light brown sugar, and the entire can of sweetened condensed milk over medium-low heat. Stir continuously with a high-heat silicone spatula, making sure to scrape the bottom corners of the pan to prevent the milk sugars from scorching. Bring the mixture to a very gentle boil. Once bubbles begin to break the surface, reduce the heat to low and simmer for exactly 6 minutes while stirring. The caramel will undergo a color transformation, changing from a pale cream to a thick, rich amber color. Remove from heat and pour immediately over your cooled shortbread base. Sprinkle the flaky sea salt evenly across the hot caramel. Let it sit at room temperature for 25 minutes to set.
Step 3: Formulating the Chocolate Cap
Melt your dark chocolate chips and the tablespoon of vegetable oil together using a double boiler over gently simmering water, or in short 20-second bursts inside a microwave. Stir the chocolate continuously until it is completely liquid and glossy. Pour the chocolate over the cooled caramel layer, using an offset spatula to smooth it into an even 3mm cap.
Step 4: Slicing to Precision
Leave the pan on your counter at room temperature for 1 hour to let the chocolate cool slowly, then transfer it to the refrigerator for 20 minutes to finish setting. When you are ready to cut the bars, lift the parchment paper handles out of the pan and place the block onto a cutting board. Heat a large chef's knife under hot running water for 15 seconds, wipe it completely dry with a clean towel, and press straight down through the layers in a single motion. Wipe the blade clean and re-heat it before making your next cut to ensure perfectly clean squares.