Have you ever sliced into a beautifully decorated cake only to find the interior dry and crumbly? It is a common disappointment, especially with scratch-made cakes. While bakeries manage to keep their cake layers incredibly soft, moist, and flavorful for days, home bakers often struggle to maintain that fresh-baked texture overnight.
The secret weapon used by professional pastry chefs worldwide is a simple technique known as the soak.
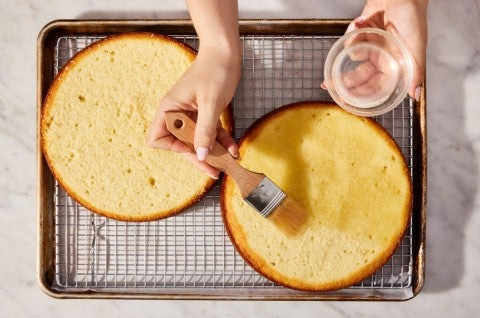
By brushing or spraying cake layers with a specially prepared liquid simple syrup, you create a moisture barrier directly inside the sponge. This process does not make the cake soggy. Instead, it preserves the delicate crumb structure, enhances the shelf life of your cake, and allows you to introduce complementary layers of flavor that elevate the entire dessert.
The Science of Sugar and Moisture
To understand why a simple syrup soak is so effective, you have to look at the behavior of sugar. Sugar is highly hygroscopic, meaning it naturally attracts and binds with water molecules.
When you bake a cake, the heat of the oven drives out moisture. If your recipe is low in fat or uses a delicate egg-foam base like a traditional European Genoise sponge, it will naturally dry out quickly when exposed to the air.
When you apply a simple syrup soak, the sugar molecules in the syrup lock onto the remaining moisture inside the crumb. This completely prevents the starch molecules in the flour from crystallizing and going stale, keeping the cake sponge soft and springy even after days in a cold refrigerator.
The Master Simple Syrup Ratio and Variations
The foundation of a perfect cake soak is a classic 1:1 simple syrup. This weight-based balance provides exactly enough hydration without making the sugar content cloying or heavy.
The Base Formula: Combine 1 cup (200 grams) of white granulated sugar with 1 cup (240 milliliters) of water in a small saucepan. Heat gently over medium heat, stirring occasionally, just until the sugar crystals dissolve completely. Bring to a bare simmer, then remove from the heat and allow the liquid to cool to room temperature.
Once you master the base formula, you can customize your soak to match the specific flavor profile of your cake:
| Cake Flavor Profile | Recommended Syrup Infusion | Timing of Infusion |
| Classic Vanilla or Fruit | Vanilla bean paste or fresh lemon peel | Add to the saucepan while heating to steep |
| Rich Chocolate or Mocha | Espresso powder or dark coffee liquor | Whisk into the warm syrup after removing from heat |
| Tropical or Coconut | Splash of coconut rum or coconut water | Mix into the cooled syrup just before application |
| Spiced or Autumnal | Whole cinnamon sticks and cracked cloves | Simmer gently in the syrup for 5 minutes, then strain |
The Step-by-Step Soaking Protocol
Applying simple syrup requires a careful, controlled hand. Adding too much liquid will turn your beautiful sponge cake into a soggy paste, while adding too little will leave it dry.
Troubleshooting Your Cake Soak
If you are new to using simple syrups, use these visual checks to keep your cake structure perfectly balanced:
Problem: The Bottom of the Cake is Soggy and Falling Apart
The Cause: You over-saturated the cake layer, or you applied the syrup to a cake that was still warm. As a general rule of thumb, a standard 8-inch or 9-inch cake layer only requires roughly 2 to 3 tablespoons of simple syrup in total to stay moist without breaking down.
Problem: The Syrup is Running Off the Cake Without Absorbing
The Cause: Your syrup may be too thick, or you forgot to level the cake layer to expose the interior crumb. Ensure you are using an exact 1:1 ratio of sugar to water. If the syrup cooks down too long on the stove, it turns into a thick glaze that cannot penetrate the fine pores of a sponge cake.
Problem: The Finished Cake is Blisteringly Sweet
The Cause: Your cake recipe already contains a high concentration of sugar, and a heavy syrup soak has thrown off the flavor balance. To fix this, you can substitute a portion of the water in your base formula with unsweetened fruit juice, or use a "diluted soak" made of 2 parts water to 1 part sugar for a lighter touch.